Hotline: +84 - 911522133
In this post we’re going to download the Certified Ubuntu 20.04 LTS image for the ZCU106 board and get it running on the hardware. This is a fairly simple post but I’ve got to write it up in preparation for future posts where we will dig deeper into this exciting new way of developing applications for Zynq UltraScale+ devices.
Here’s what you’ll need:
- ZCU106 Zynq UltraScale+ Development board
- SanDisk 32GB microSD card (or one with a fairly good capacity)
- USB keyboard and mouse connected to the ZCU106
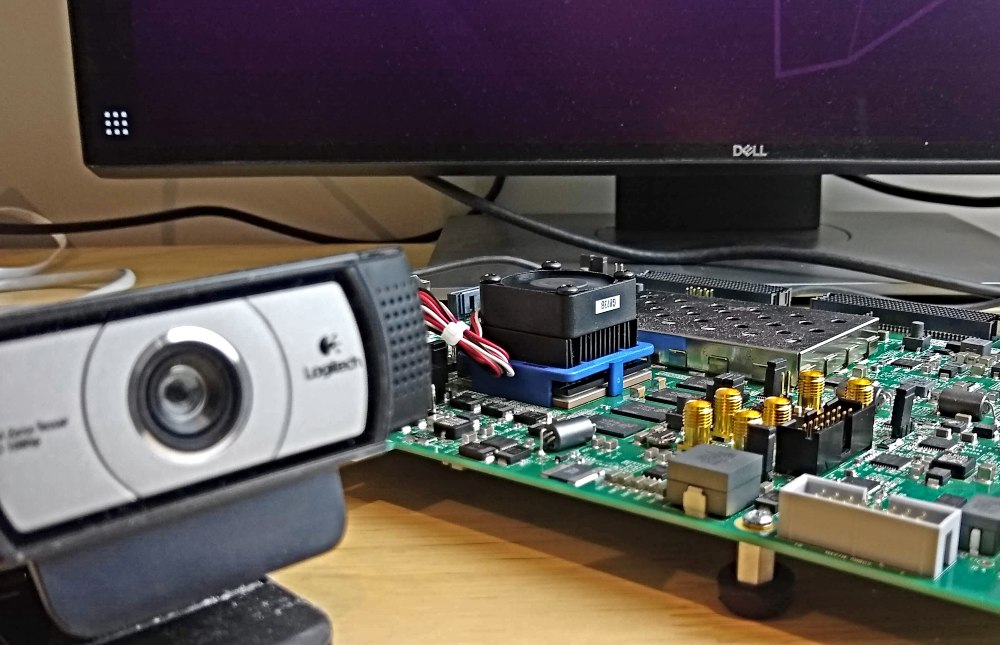
- USB webcam (if you want to try a video application at the end)
- USB hub (since ZCU106 has only one USB connector)
- DisplayPort cable connecting ZCU106 to a monitor
- Ethernet cable connecting to your network router
Burn the ZCU10x Ubuntu image to an SD card
Start by downloading Ubuntu 20.04 LTS for ZCU10x. You will see that there is already a more recent version available (22.04), but in this post we will use the older version (20.04). At the time of writing, the newer version doesn’t yet have support for some of the interesting applications that we would like to test on it such as the Vitis AI Library Samples snap.
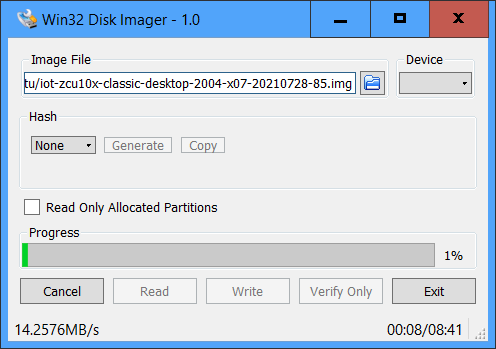
Once you’ve downloaded the file (iot-zcu10x-classic-desktop-2004-x07-20210728-85.img.xz) to your desktop PC , you will have to extract the image file from it. If you’re using Windows, you would use 7-Zip to extract the image file. If you’re using Ubuntu, you can just right click on the file and click “Extract Here”.
Now you need to apply that image file to your SD card. In Windows, I use Win32DiskImager. In Ubuntu, you would use Disk Image Writer. Make sure that your SD card is plugged in, and that you have correctly selected it as the target disk.
Boot Ubuntu on the ZCU106
With the keyboard, mouse, DisplayPort monitor and Ethernet plugged into the ZCU106, insert the SD card into the slot and power up the board. 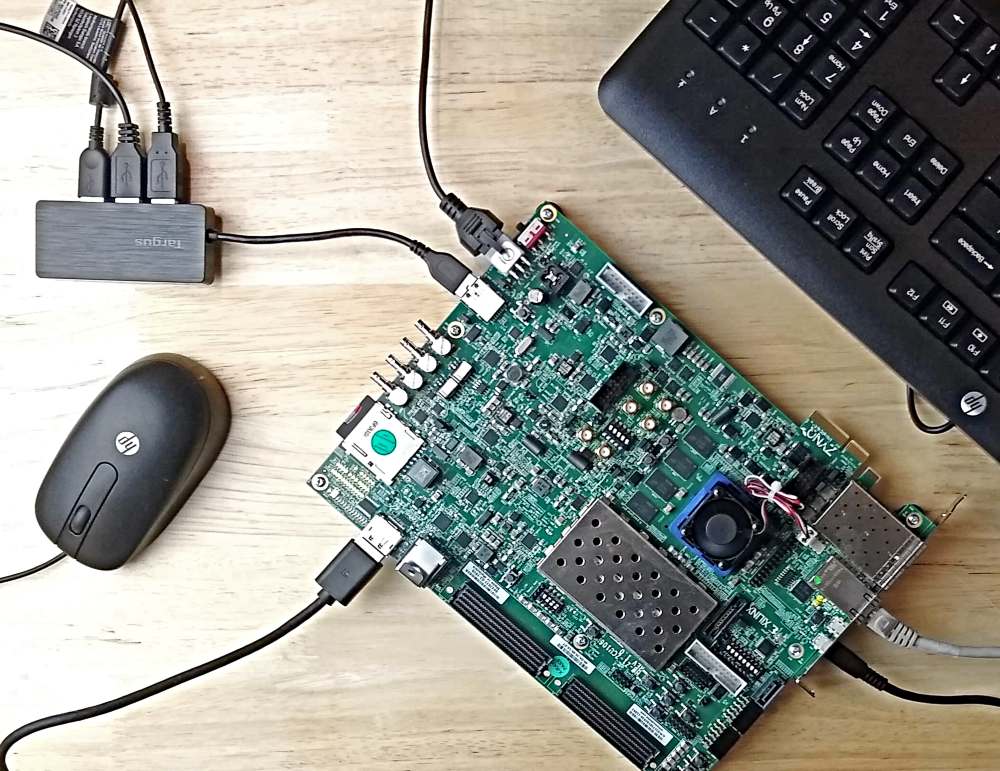
If you want to have a terminal interface to the board from your desktop PC, you can plug a USB cable into the USB-UART port (labelled “UART” on the PC mounting bracket, shown in the bottom right corner of the above image) and open a serial terminal set to the correct comport and the speed of 115200bps. You don’t have to do this if you intend to use the Ubuntu GUI.
After a minute or so you should see the Ubuntu login screen on the monitor. Login to Ubuntu using these credentials:
-
Username:
ubuntu -
Password:
ubuntu
You should then be forced to change the password. The username will be the same.
Now let’s open a command terminal in Ubuntu. The easy way to do that is by pressing Ctrl-Alt-T. Alternatively you can click the button in the bottom left corner of the screen (Show Applications) and then typing terminal in the search bar.
With the terminal open, we want to make sure that the board has access to the internet. We can do this by running ping: ping 8.8.8.8
If you can’t ping successfully with that, then you need to figure out what is wrong with your network connection and fix it, because we will need it to install the updates in the following steps.
Update the system
You just got a fresh Ubuntu installation up and running. We should start things off by updating core utilities, but if this is your first time booting, you’re probably going to get blocked by unattended-upgrades (more about that here). The automatic updater is likely to have a long queue of updates that it is currently downloading and preparing in the background, and during that time it wont let you update things manually as we would like to. So first what we want to do is to temporarily switch off unattended-upgrades, do our updates, install the rest of our tools and then turn it back on when we are done.
-
Stop
unattended-upgrades(the automatic updater) by running the following command:
sudo dpkg-reconfigure -plow unattended-upgrades
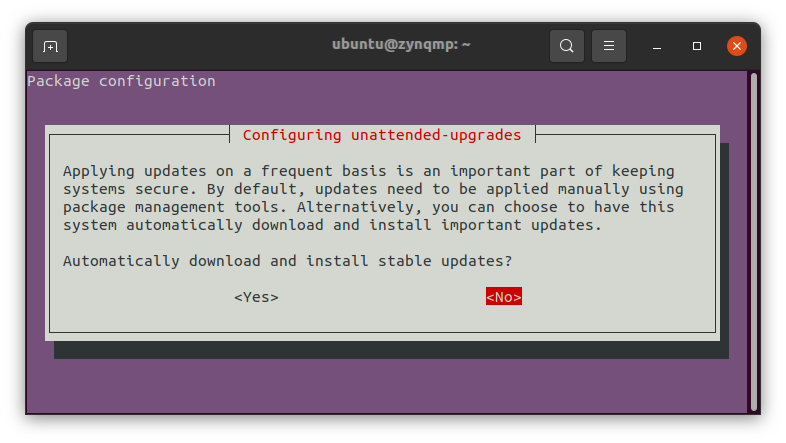
- You will be asked if you want to automatically download and install stable updates. Select “No” and press Enter (don’t worry we’ll turn it back on later). Then reboot the system (be patient, the reboot takes a few minutes).
reboot
-
Login to Ubuntu again, open a terminal (
Ctrl-Alt-T) and update the system:
sudo apt update
sudo apt -f install
sudo apt full-upgrade
-
Now we can install the
xlnx-configsnap:
sudo snap install xlnx-config --classic --channel=1.x
-
Then run the
xlnx-config.sysinitcommand:
sudo xlnx-config.sysinit
-
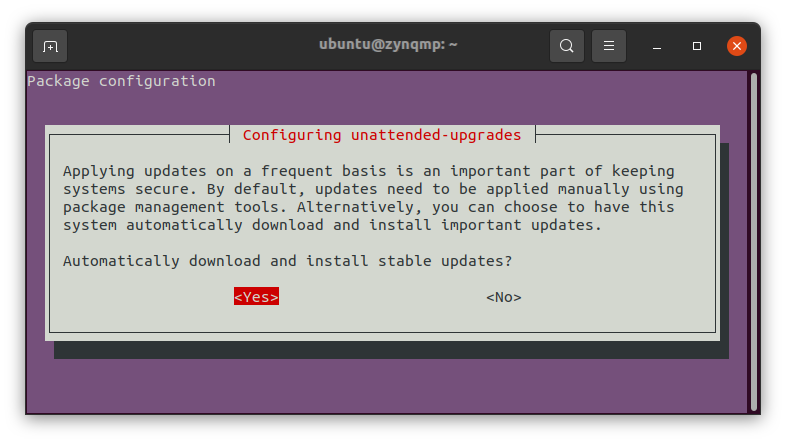
Turn
unattended-upgradesback on. Select “Yes”.
sudo dpkg-reconfigure -plow unattended-upgrades
Time to play
We’ve achieved the goal of this post for today, but if you want to have some fun with this, I suggest you take a look at the Vitis AI Library Sample Applications. Here are a few instructions to help you get started:
- Plug a USB webcam into the USB port of the ZCU106. You will need a USB hub so that you can keep your keyboard and mouse plugged in.
-
In Ubuntu on the ZCU106, open a terminal window by pressing
Ctrl-Alt-T. -
Install the
xlnx-vai-lib-samplessnap like this:sudo snap install xlnx-vai-lib-samples -
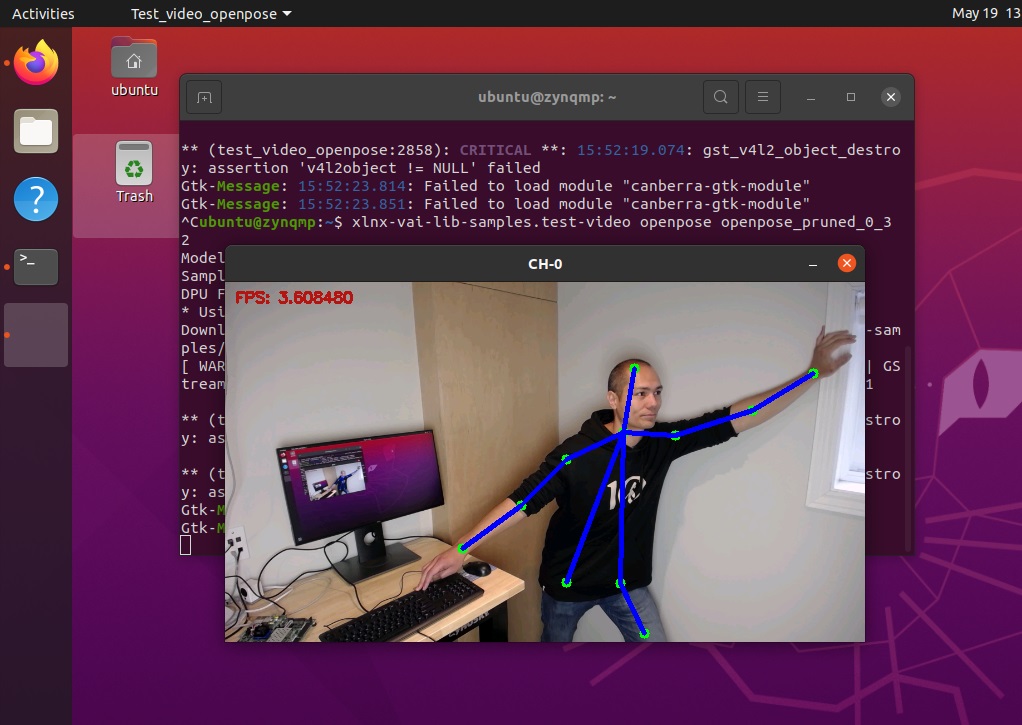
Run the open pose application, and stand in front of your webcam:
xlnx-vai-lib-samples.test-video openpose openpose_pruned_0_3 2
Have fun!