This is the final part of a three part tutorial series on creating a PCI Express Root Complex design in Vivado and connecting a PCIe NVMe solid-state drive to an FPGA.
In this final part of the tutorial series, we’ll start by testing our hardware with a stand-alone application that will verify the status of the PCIe link and perform enumeration of the PCIe end-points. We’ll then run PetaLinux on the FPGA and prepare our SSD for use under the operating system. PetaLinux will be built for our custom hardware using the PetaLinux SDK and the Vivado generated hardware description. Using Linux commands, we will then create a partition, a file system and a file on the solid-state drive.
This part of the tutorial applies to both the Microblaze and Zynq designs developed in the previous tutorials. Where the instructions differ between the designs, they are split into two branches.
Requirements
To complete this tutorial you will need the following:
Note: The tutorial text and screenshots are suitable for Vivado 2015.4 however the sources in the Git repository will be regularly updated to the latest version of Vivado.
PetaLinux SDK 2015.4 only runs in the Linux operating system, so Windows users (like me) have to have two machines to follow this tutorial. You can either have two physical machines, which is how I work, or you can have one Windows machine and one Linux virtual machine. In this tutorial, I will assume that you have two physical machines, one running Windows and the other running Linux. My personal setup uses Windows 7 and Ubuntu 14.04 LTS on two separate machines.
If you are building your Linux setup for the first time, here are the supported OSes according to the PetaLinux SDK Installation guide:
-
RHEL 5 (32-bit or 64-bit)
-
RHEL 6 (32-bit or 64-bit)
-
SUSE Enterprise 11 (32-bit or 64-bit)
Note: I had problems installing PetaLinux SDK 2015.4 on 32-bit Ubuntu, as did others, so I use 64-bit Ubuntu and I haven’t had any problems with my setup.
Setup the hardware: KC705
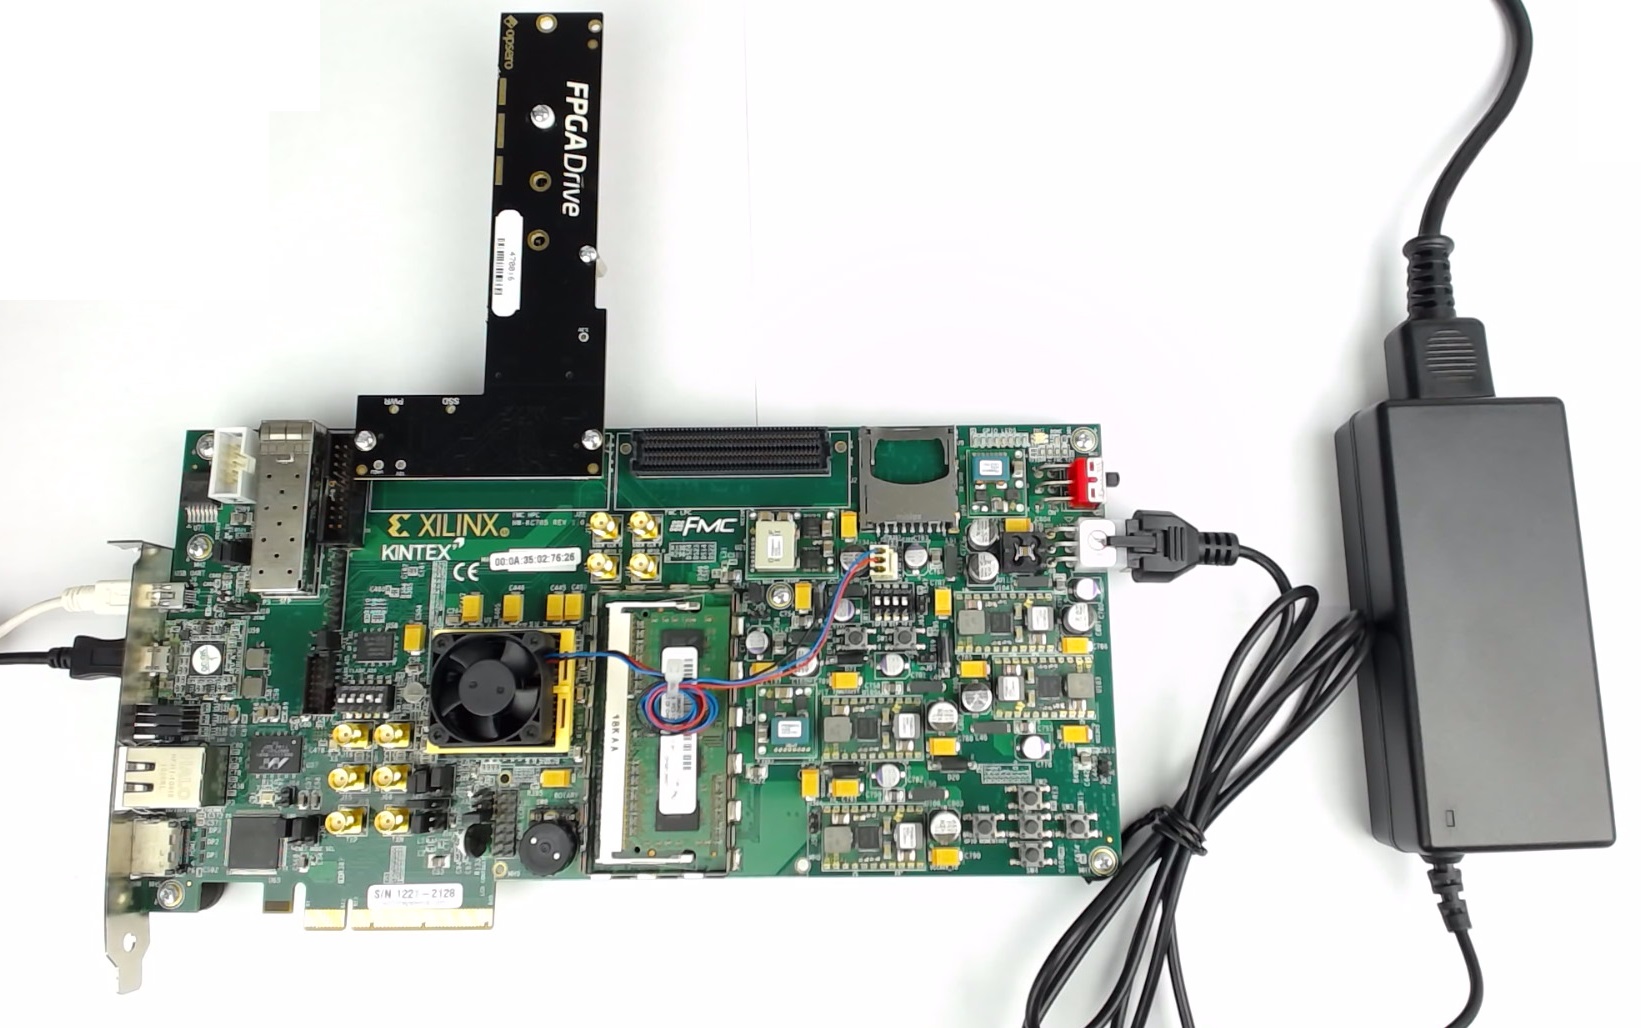
The KC705 Evaluation Board must be setup as shown in the image below. It is strongly recommended that you make the connections in the precise order described below.
-
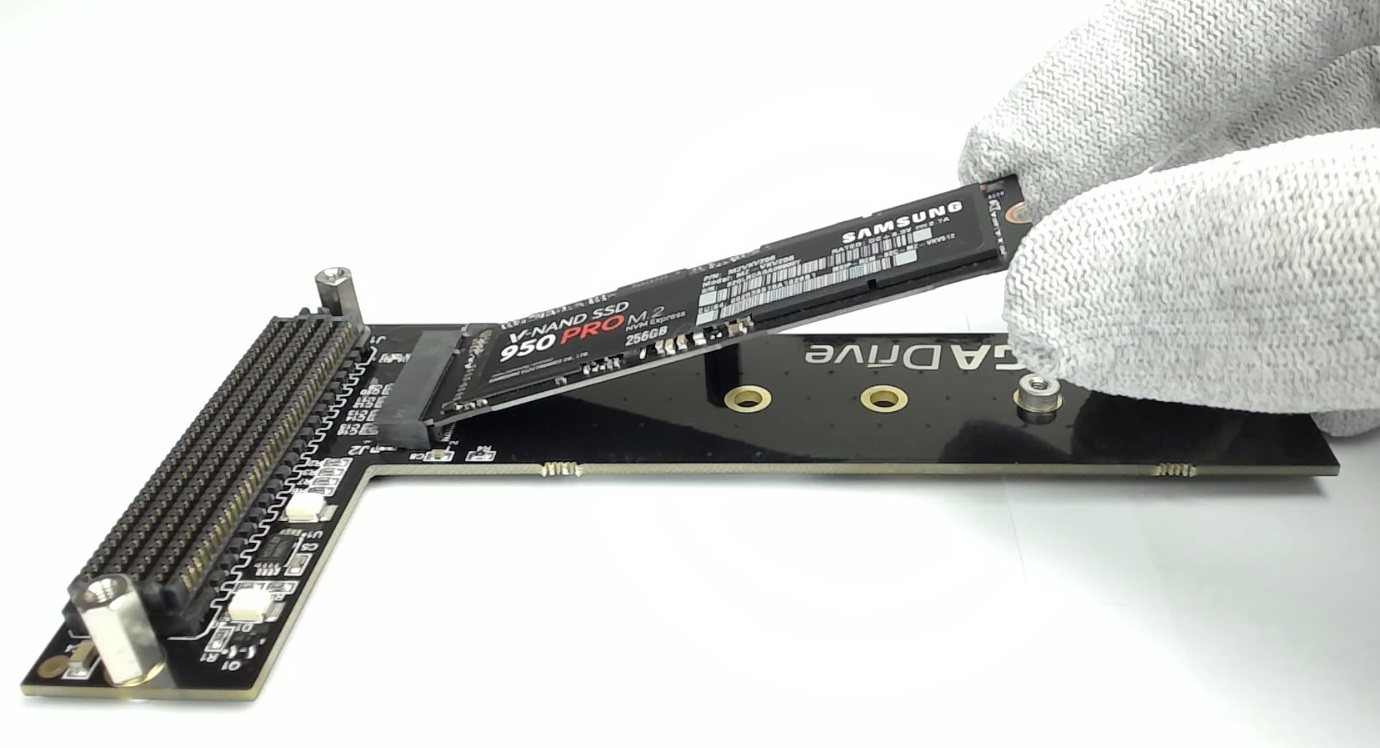
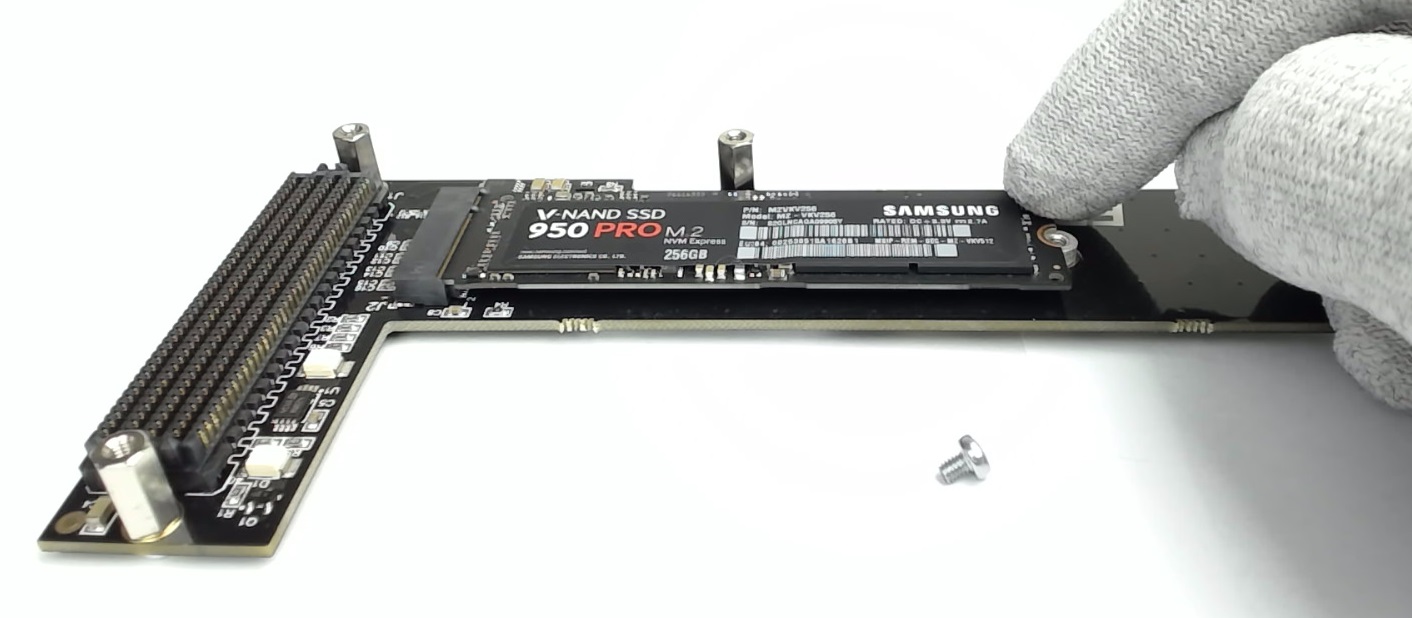
Connect the M.2 PCIe SSD to the FPGA Drive adapter, and tighten the fixing screw. Note that you have to insert the SSD into the M.2 connector at an angle as shown in the first image.
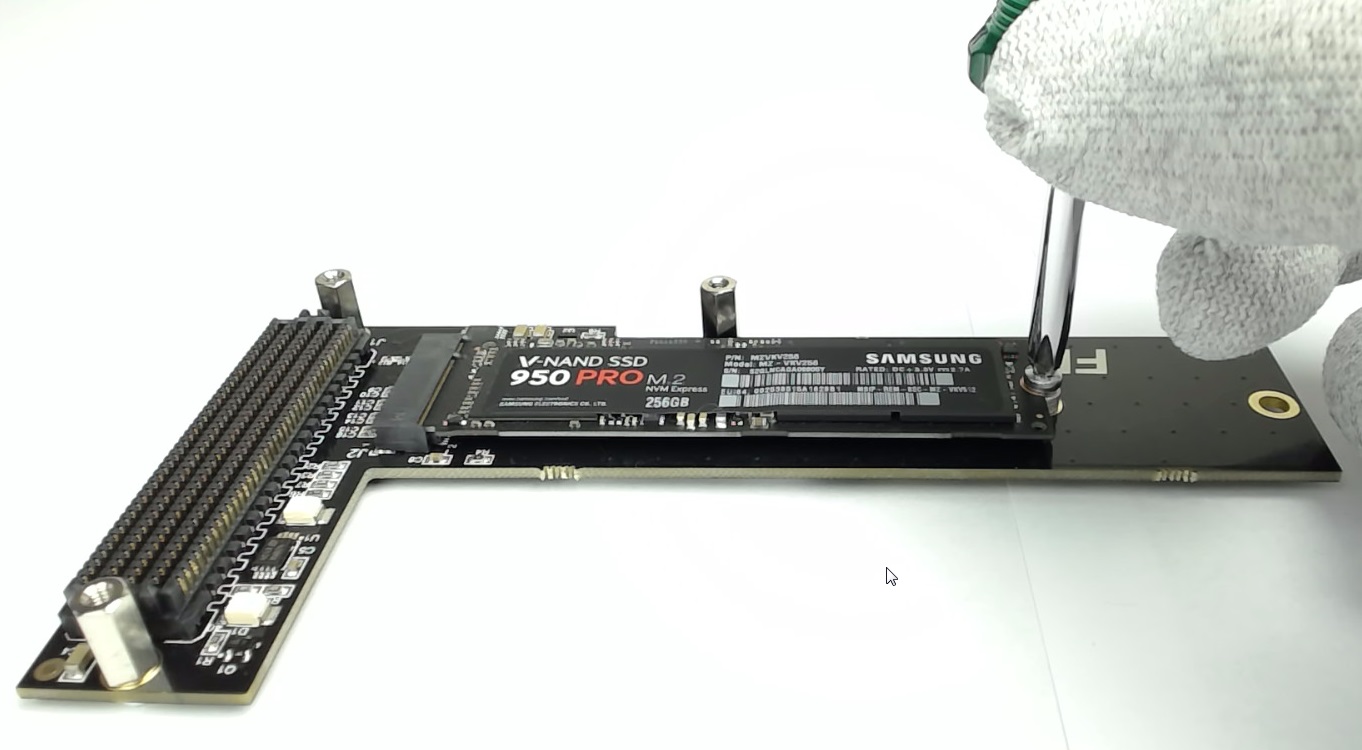
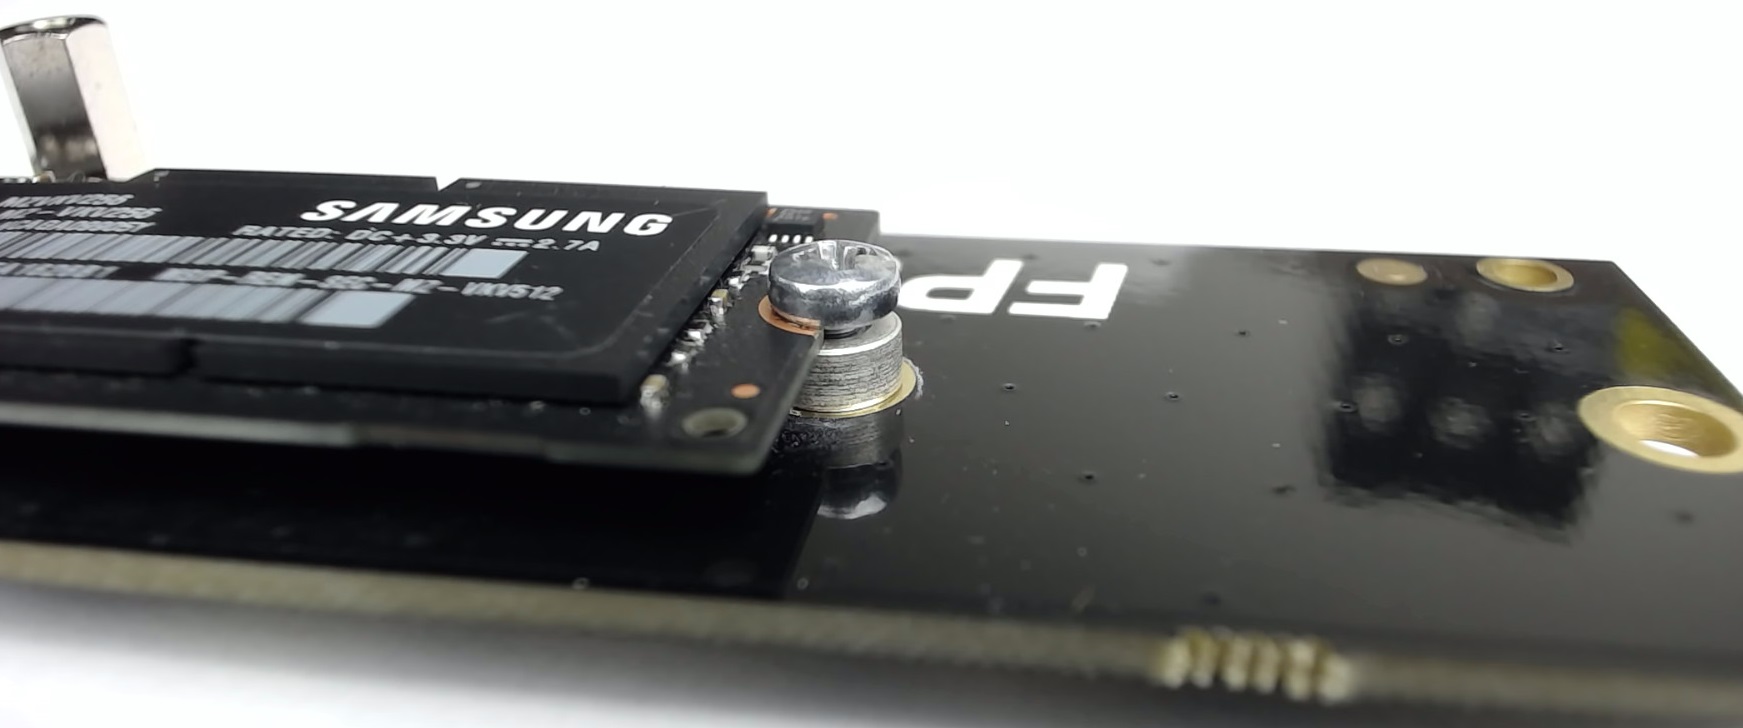
-
Connect the FPGA Drive to the KC705 high pin count (HPC) FMC connector. Do NOT put pressure on the M.2 SSD while doing this.
-
Connect the power adapter to the KC705 power connector (J49).
-
Connect a USB cable between your PC and the UART port of the KC705
-
Connect a USB cable between your PC and the JTAG port of the KC705
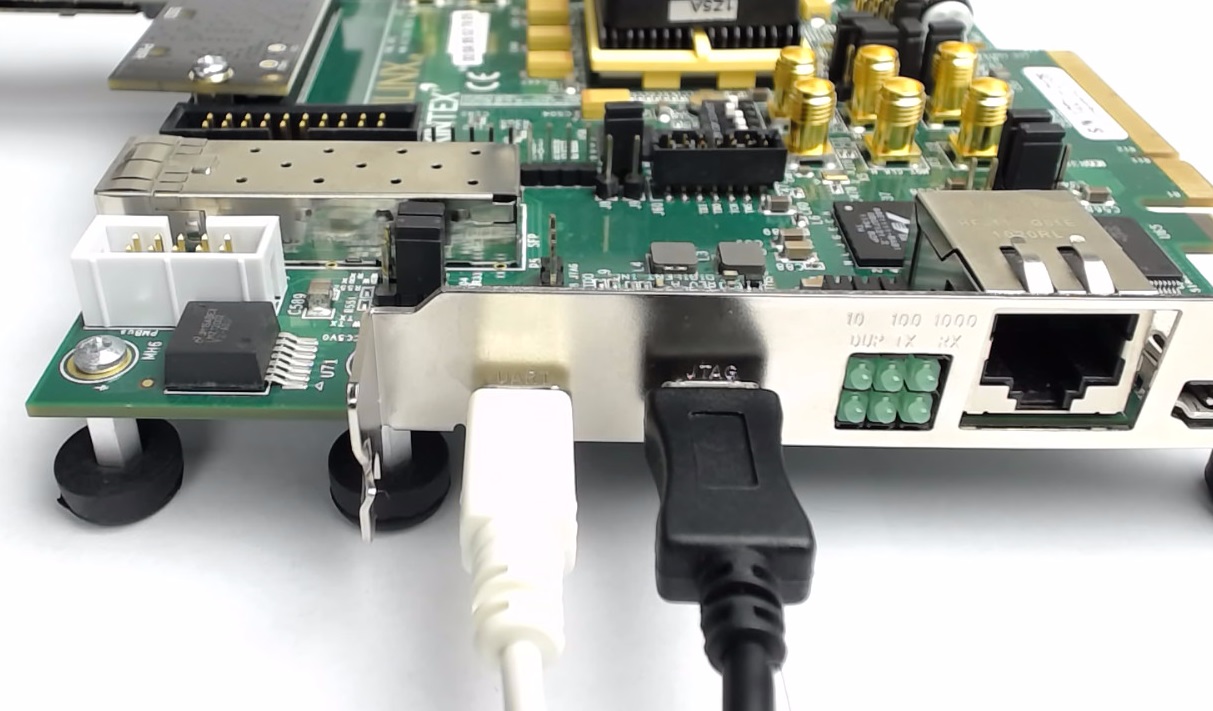
-
Set DIP switches (SW13) to 11101 (this is for configuration by JTAG, see UG810 page 73)
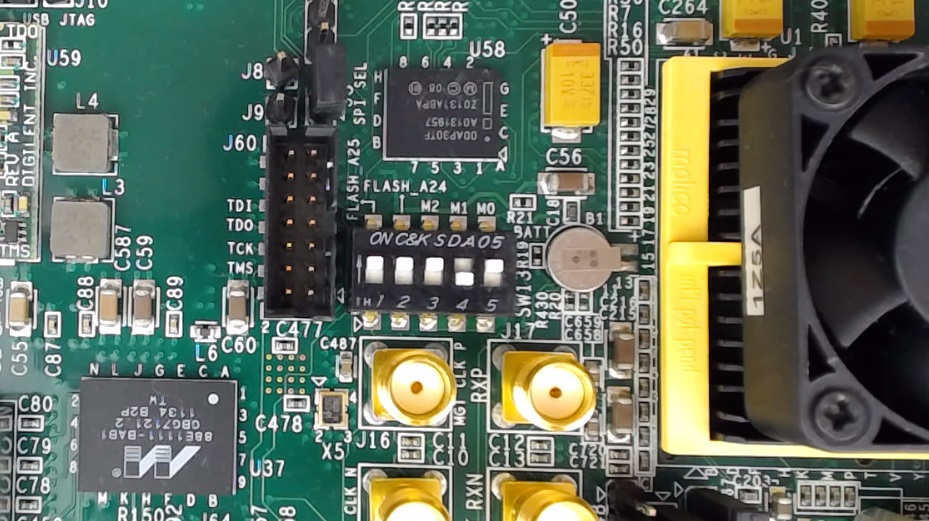
Setup the hardware: PicoZed and PicoZed FMC Carrier Card V2
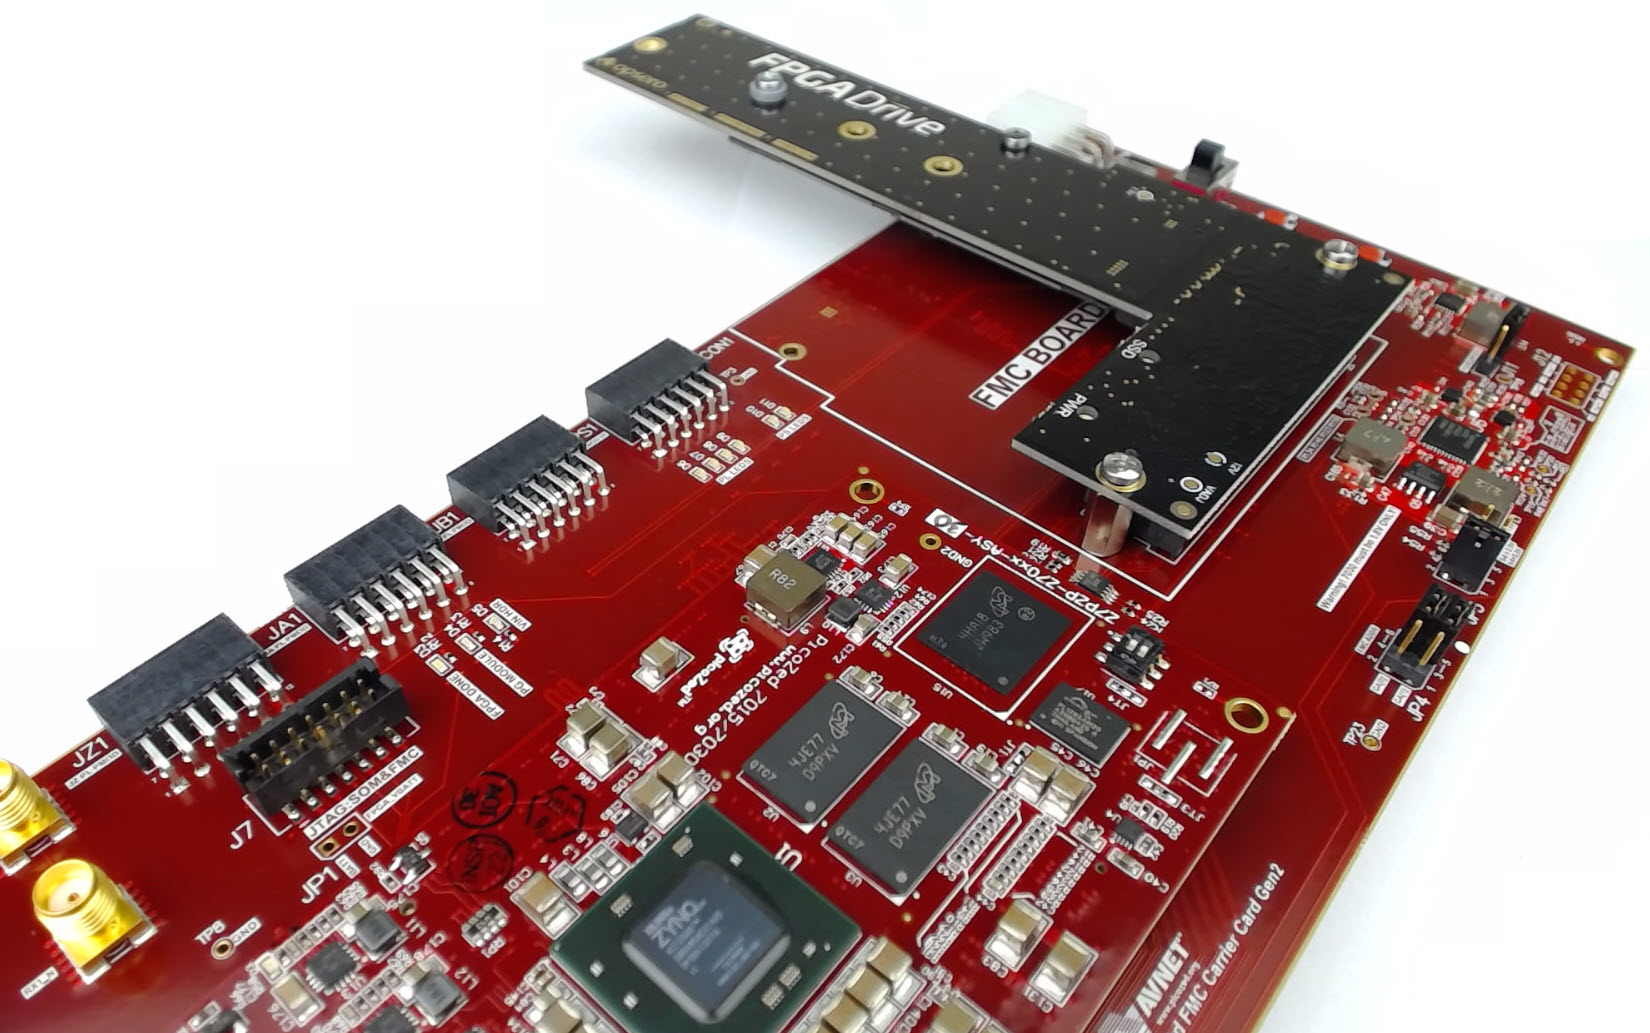
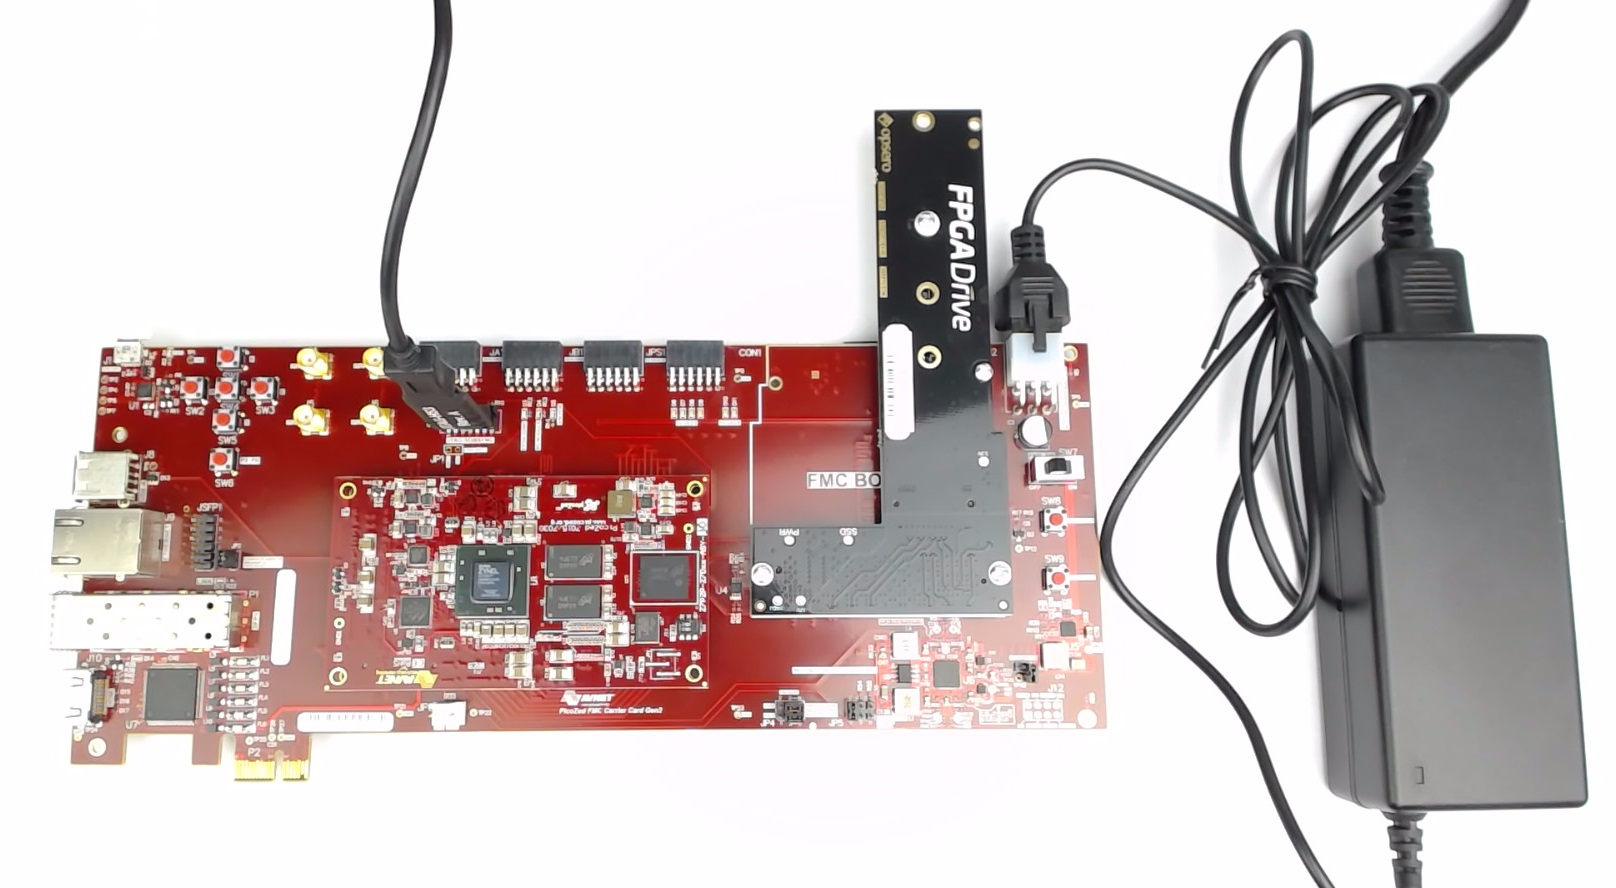
The PicoZed 7Z030 and PicoZed FMC Carrier Card V2 must be setup as shown in the image below. It is strongly recommended that you make the connections in the precise order described below.
-
Insert the PicoZed into the SoM socket of the PicoZed FMC Carrier Card V2

-
Connect the M.2 PCIe SSD to the FPGA Drive adapter, and tighten the fixing screw. Note that you have to insert the SSD into the M.2 connector at an angle as shown in the first image. Refer to the images shown in the KC705 setup above.
-
Connect the FPGA Drive to the PicoZed FMC Carrier Card V2 low pin count (LPC) FMC connector. Do NOT put pressure on the M.2 SSD while doing this.
-
Connect the power adapter to the PicoZed FMC Carrier Card V2 power connector (J2).
-
Connect a USB cable between your PC and the UART port of the PicoZed FMC Carrier Card V2
-
Connect a JTAG programmer between your PC and the JTAG port (J7) of the PicoZed FMC Carrier Card V2
-
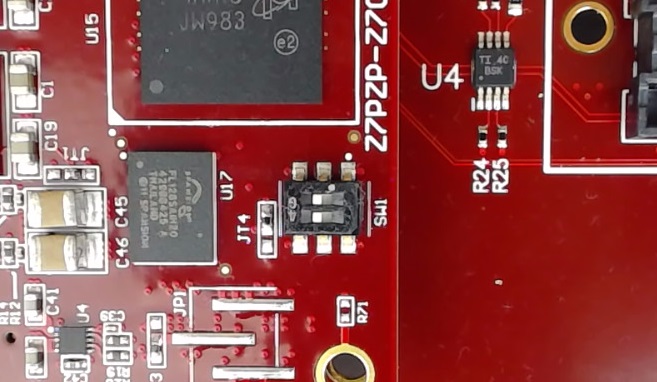
Set DIP switches (SW1) to 00 (this is for configuration by JTAG, see PicoZed 7015/7030 User guide table 13)
Regenerate the Vivado project
If you did not follow either of the previous tutorials, and you do not have a completed Vivado project, then follow these instructions to regenerate the Vivado project from scripts. Please note that the Git repository is regularly updated for the latest version of Vivado, so you must download the last “commit” for the version of Vivado that you are using.
-
Download the sources from Github here: https://github.com/fpgadeveloper/fpga-drive-aximm-pcie
-
Depending on your operating system:
-
If you are using a Windows machine, open Windows Explorer, browse to the “Vivado” folder within the sources you just downloaded. Double-click on the
build-.bat file to run the batch file.
-
If you are using a Linux machine, run Vivado and then select Window->Tcl Console from the welcome screen. In the Tcl console, use the “cd” command to navigate to the “Vivado” folder within the sources you just downloaded. Then type
source build-.tcl to run the build script.
-
Once the script has finished running, the Vivado project should be regenerated and located in the “Vivado” folder. Run Vivado and open the newly generated project.
Note: You must replace kc705 or pz-7z030, depending on the target hardware you are using.
Generate a bitstream
The first thing we’ll need to do is to generate a bitstream from the Vivado project we created in the earlier tutorials.
-
Open the project in Vivado.
-
From the Flow Navigator, click “Generate Bitstream”.

-
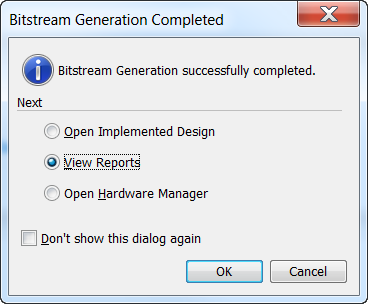
Depending on your machine, it will take several minutes to perform synthesis and implementation. In the end, you should see the following message. Just select “View Reports” and click OK.
-
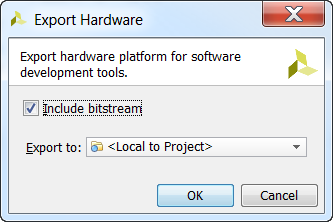
Now we need to use the “Export to SDK” feature to create a hardware description file (.hdf) for the project. From the menu, select File->Export->Export Hardware.
-
In the Export Hardware window, tick “Include bitstream” and choose “Local to Project” as the export location.
Launch Xilinx SDK
At this point it’s best to launch the Xilinx SDK from Vivado, because it will automatically setup our SDK workspace with a hardware platform based on our project’s hardware description file.
-
From the menu, select File->Launch SDK.
-
Specify both the exported location and workspace as “Local to Project”.
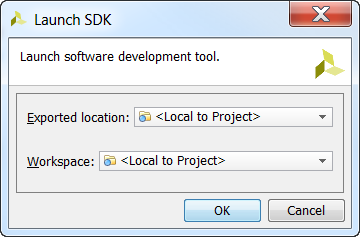
-
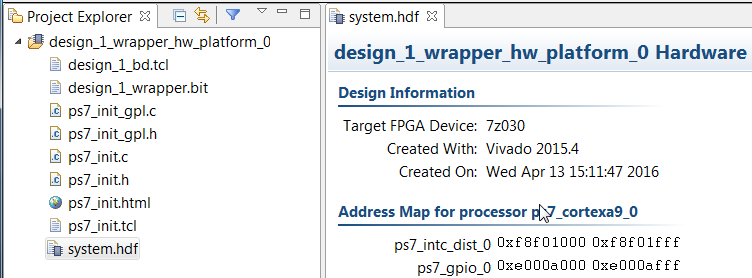
The SDK should automatically create the hardware platform (design_1_wrapper_hw_platform_0) for you, and you should see it in the Project Explorer as seen in the image below - first image is for the KC705, and the second image is for the PicoZed.

-
Now we want to create a template software application, so that we can simply insert code and run it. From the menu, select File->New->Application Project.

-
In the New Project window, type
pcie_test as the Project name and click Next. The right Processor for your hardware should already be selected. The image below shows ps7_cortexa9_0 for the PicoZed, but for the KC705, it will be microblaze_0.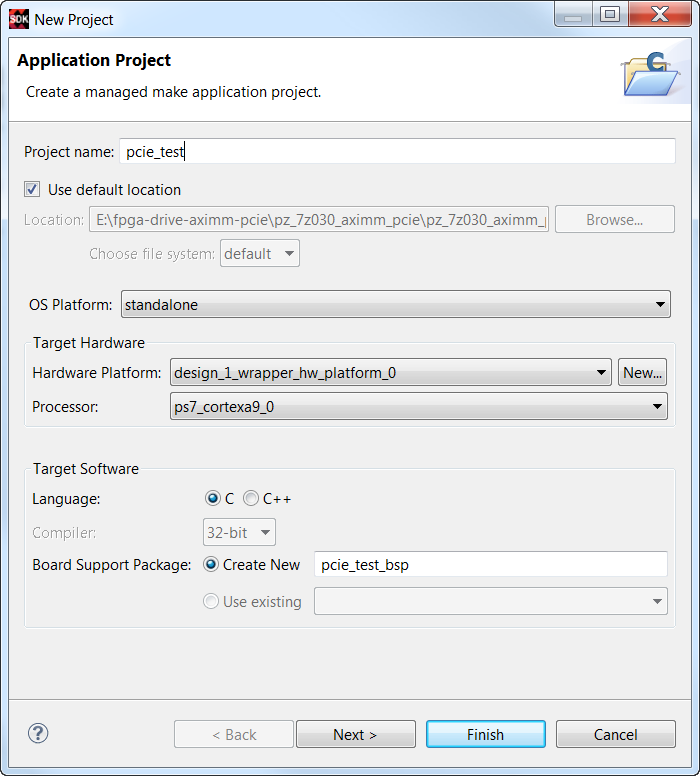
-
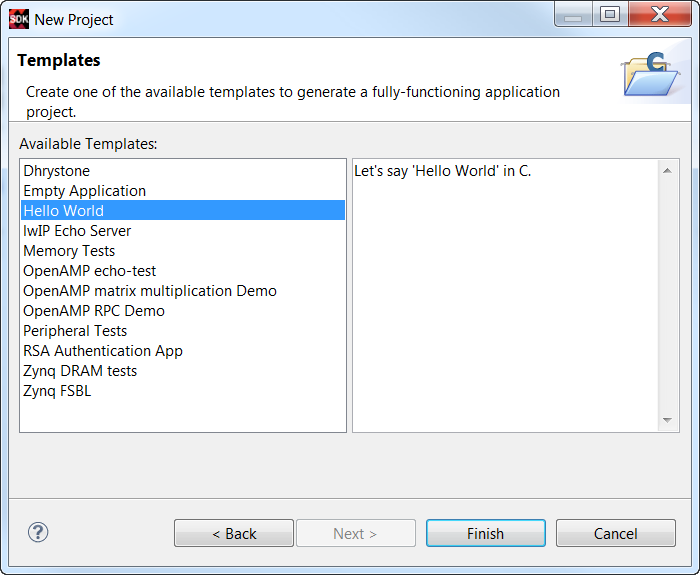
Select the “Hello World” template and click Finish.
-
You should now see the software application
pcie_test and the BSP pcie_test_bsp added to your workspace in the Project Explorer.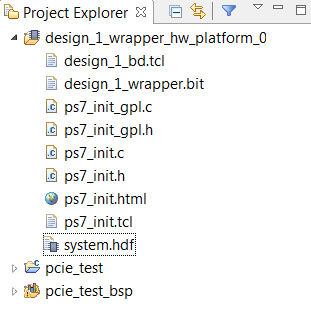
-
Now we need to get the code to test our PCIe link. We will use an example from Xilinx which you can find in the Xilinx SDK installation folders at this location:
C:\Xilinx\SDK\2015.4\data\embeddedsw\XilinxProcessorIPLib\drivers\axipcie_v3_0\examples\xaxipcie_rc_enumerate_example.c
-
In Windows Explorer, browse to the above “examples” folder, right click on the source file and select “Copy”.
-
Now return to Xilinx SDK and open the
pcie_test tree to reveal the “src” folder. Now right click on the “src” folder and select “Paste”. This will copy the source file into our application.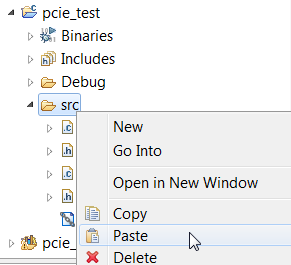
-
Now select the
helloworld.c file in the “src” folder and press Del to delete the file.
-
SDK will automatically rebuild the software application.
Now we are ready to run the stand-alone application on the hardware.
Run the stand-alone application
-
Power up the hardware.
-
Open Putty or a similar terminal program to receive the console output from the UART.
-
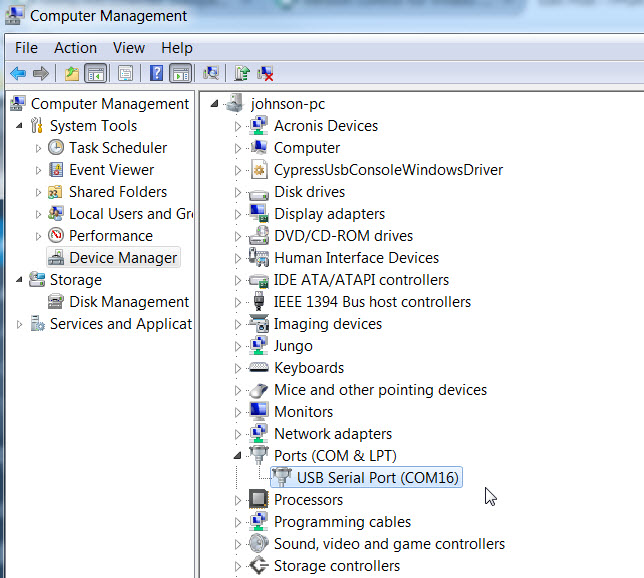
Check your device manager to find the USB-UART, and it’s comport. The example below shows COM16. If you don’t find one, then ensure that you have a USB cable between the PC and the UART port of your FPGA board.
-
In Putty, open a new session using the comport that you just located and the following settings:
-
Baud rate: 9600bps
-
Data: 8 bits
-
Parity: None
-
Stop bits: 1
-
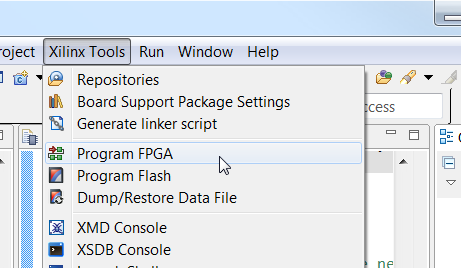
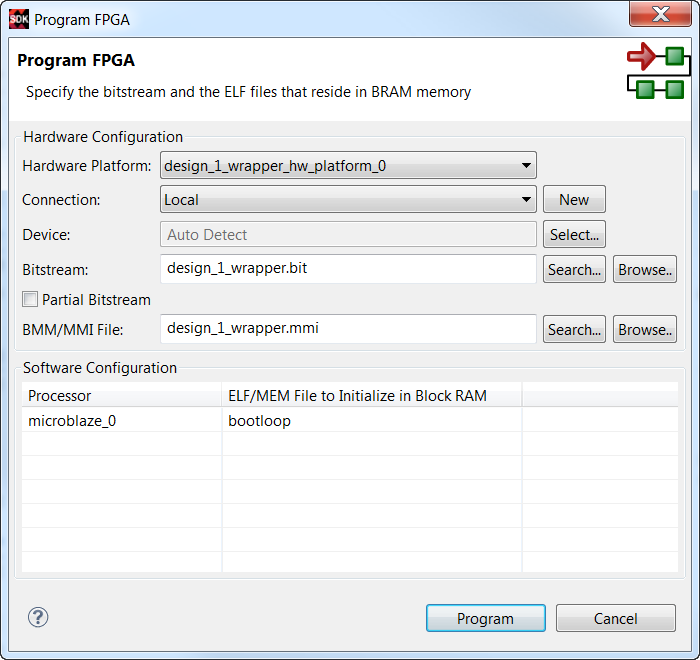
Now returning to the SDK, from the menu, select Xilinx Tools->Program FPGA.
-
In the Program FPGA window, we select the hardware platform to program. We have only one hardware platform, so click “Program”. The image below, taken for the KC705 design, shows that the Microblaze will be loaded with the bootloop program. If you are using the PicoZed, you will not be loading the processor with anything and so this line will be blank.
-
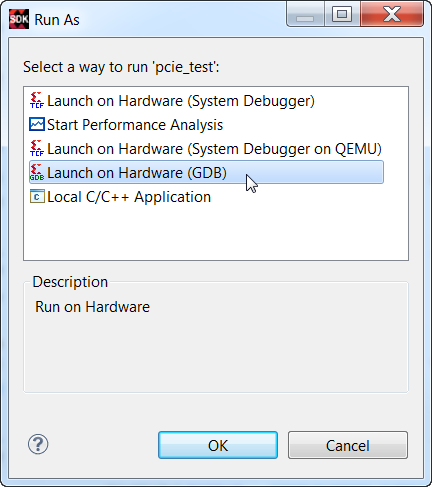
The bitstream will be loaded onto the FPGA and we are ready to load the software application. Select the “pcie_test” folder in the Project Explorer, then from the menu, select Run->Run.

-
In the Run As window, select “Launch on Hardware (GDB)” and click “OK”.
-
The application will be loaded on the processor and it will be executed. The terminal window should display this output:
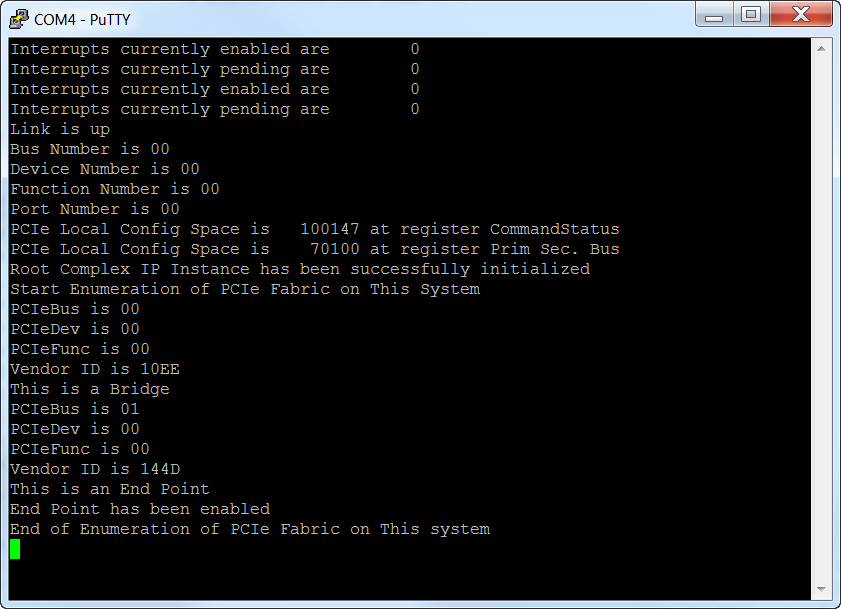
The console output shows that the PCIe “Link is up” and it has enumerated the PCIe bridge and an end-point with Vendor ID 0x144D.
Build PetaLinux
Now that we have validated our hardware, let’s get started using the PetaLinux SDK on our Linux machine.
-
On your Linux machine, start a command terminal.
-
Type
source //settings.sh into the terminal and press Enter. Obviously you must insert the location of your PetaLinux installation.
-
For consistency, let’s work from a directory called
projects/fpga-drive-aximm-pcie in your home directory. Create that directory and then cd to it.
-
Use a USB stick or another method to copy the entire Vivado project directory (should be
kc705_aximm_pcie for the KC705, pz_7z030_aximm_pcie for the PicoZed) from your Windows machine onto your Linux machine. Place it into the directory we just created.
-
Create a PetaLinux project using this command:
-
For KC705:
petalinux-create --type project --template microblaze --name petalinux_prj
-
For PicoZed:
petalinux-create --type project --template zynq --name petalinux_prj
-
Change to the
petalinux_prj directory in the command terminal.
Stay in the PetaLinux project folder from here on. It is important that all the following commands are run from the PetaLinux project folder that we just created.

-
Import the Vivado generated hardware description into our PetaLinux project with the command:
-
For KC705:
petalinux-config --get-hw-description ../kc705_aximm_pcie/kc705_aximm_pcie.sdk/
-
For PicoZed:
petalinux-config --get-hw-description ../pz_7z030_aximm_pcie/pz_7z030_aximm_pcie.sdk/
-
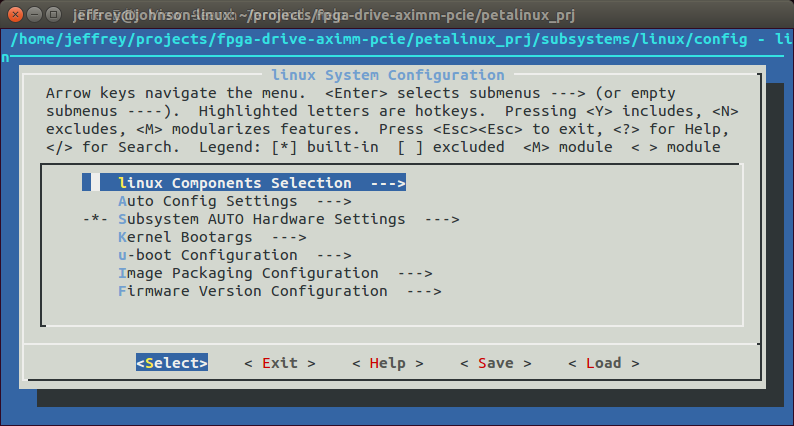
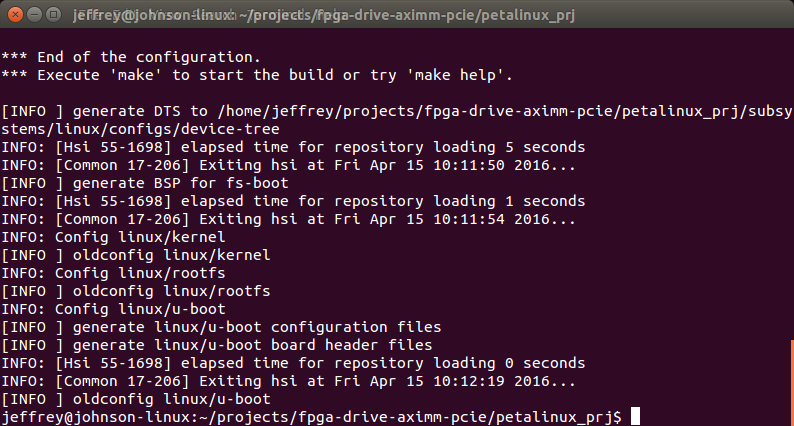
The Linux System Configuration will open, but we don’t have any changes to make here, so simply exit and save the configuration.
-
Configure the Linux kernel with the command:
petalinux-config -c kernel
-
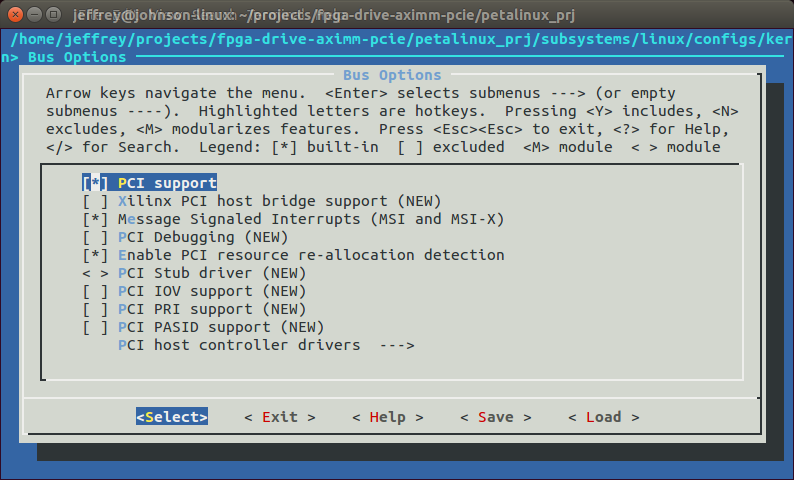
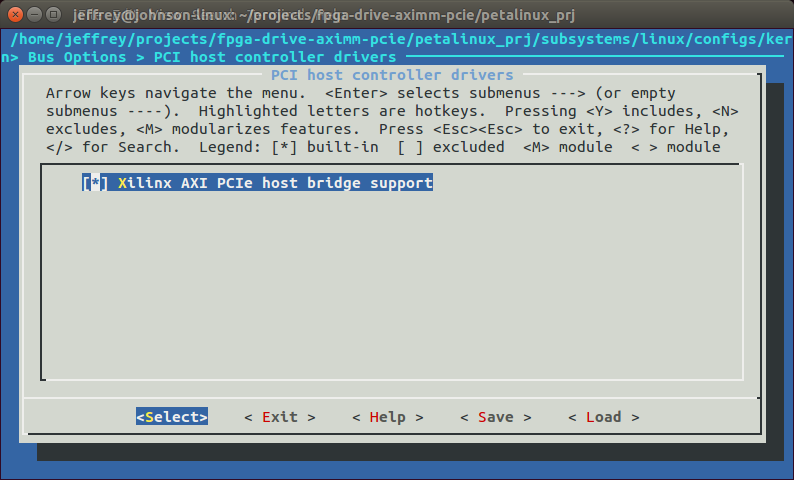
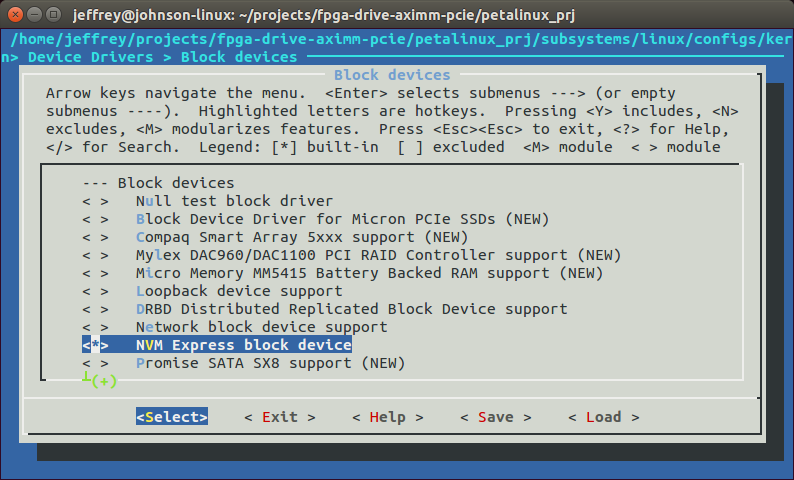
Now we use the kernel configuration menu to enable PCI support and enable the driver for NVM Express devices:
-
For KC705:
-
Enable: Bus options->PCI support
-
Enable: Bus options->PCI support->Message Signaled Interrupts (MSI and MSI-X)
-
Enable: Bus options->PCI support->Enable PCI resource re-allocation detection
-
Enable: Bus options->PCI support->PCI host controller drivers->Xilinx AXI PCIe host bridge support
-
Enable: Device Drivers->Block devices->NVM Express block device
-
For PicoZed:
-
Check: Bus options->PCI support should already be enabled by default
-
Check: Bus options->PCI support->Message Signaled Interrupts (MSI and MSI-X) should already be enabled by default
-
Check: Bus options->PCI support->Enable PCI resource re-allocation detection should already be enabled by default
-
Check: Bus options->PCI support->PCI host controller drivers->Xilinx AXI PCIe host bridge support should already be enabled by default
-
Enable: Device Drivers->Block devices->NVM Express block device

-
To configure the Linux root file system, run the command:
petalinux-config -c rootfs
-
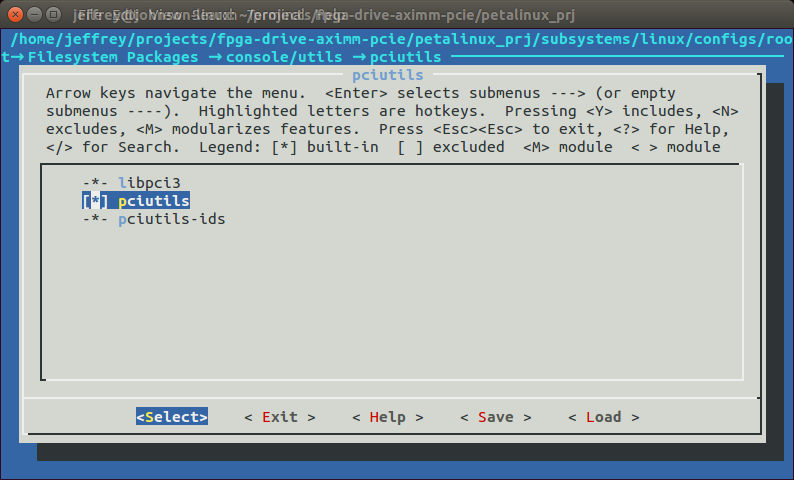
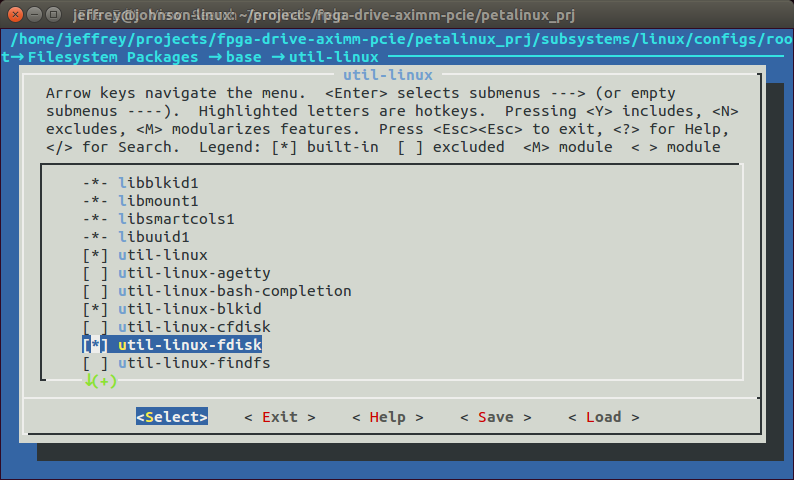
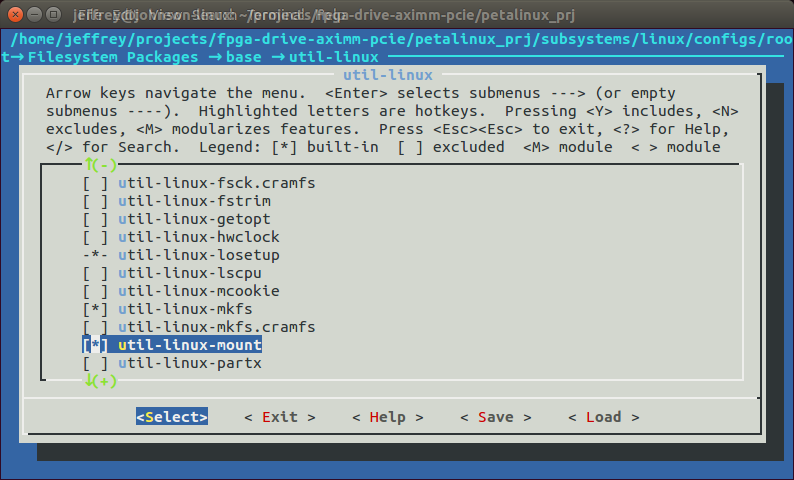
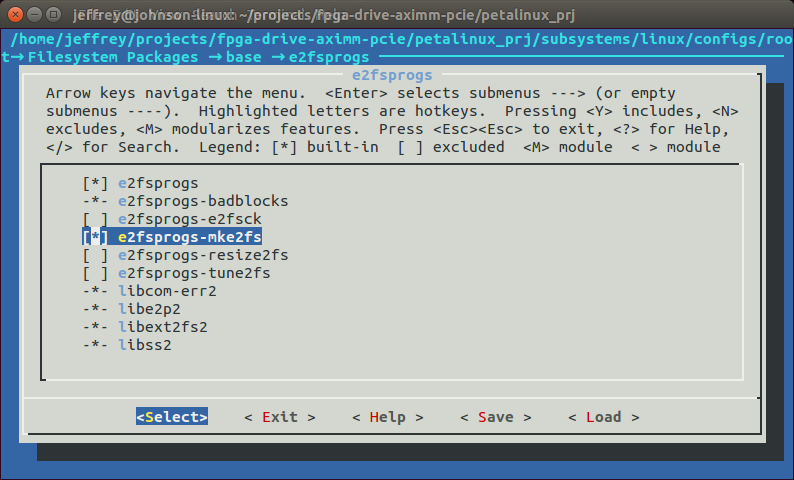
Configure the root file system to include some utilities we will need to setup the NVMe PCIe SSD:
-
Enable PCI utils (for lspci): Filesystem Packages->console/utils->pciutils->pciutils
-
Enable required packages for lsblk, fdisk, mkfs, blkid:
-
Filesystem Packages->base->util-linux->util-linux
-
Filesystem Packages->base->util-linux->util-linux-blkid
-
Filesystem Packages->base->util-linux->util-linux-fdisk
-
Filesystem Packages->base->util-linux->util-linux-mkfs
-
Filesystem Packages->base->util-linux->util-linux-mount
-
Filesystem Packages->base->e2fsprogs->e2fsprogs
-
Filesystem Packages->base->e2fsprogs->e2fsprogs-mke2fs
-
Build PetaLinux using the command:
petalinux-build
PetaLinux will take a few minutes to build depending on your machine.
Boot PetaLinux over JTAG
There are many ways to boot PetaLinux on the hardware, but to avoid going through the details of setting up a flash or SD card boot, we will use the JTAG method for this tutorial.
-
Power up the hardware.
-
Open a new session in Putty again, but this time, use a baud rate of 115200bps:
-
Baud rate: 115200bps
-
Data: 8 bits
-
Parity: None
-
Stop bits: 1
-
Boot PetaLinux using these commands:
-
For KC705, we load the bitstream then the kernel:
-
petalinux-boot --jtag --fpga --bitstream ../kc705_aximm_pcie/kc705_aximm_pcie.runs/impl_1/design_1_wrapper.bit
-
petalinux-boot --jtag --kernel
-
For PicoZed, we package everything, then load it all:
-
petalinux-package --boot --fsbl ./images/linux/zynq_fsbl.elf --fpga ../pz_7z030_aximm_pcie/pz_7z030_aximm_pcie.runs/impl_1/design_1_wrapper.bit --uboot --force
-
petalinux-package --prebuilt --fpga ../pz_7z030_aximm_pcie/pz_7z030_aximm_pcie.runs/impl_1/design_1_wrapper.bit
-
petalinux-boot --jtag --prebuilt 3 --fpga --bitstream ../pz_7z030_aximm_pcie/pz_7z030_aximm_pcie.runs/impl_1/design_1_wrapper.bit
-
It will take several minutes before the kernel has been transferred via JTAG. Wait for the command line to return, then it can take another 10-20 seconds before you see any output on the Putty terminal.
-
PetaLinux will boot and you should see the boot log on the Putty terminal window.
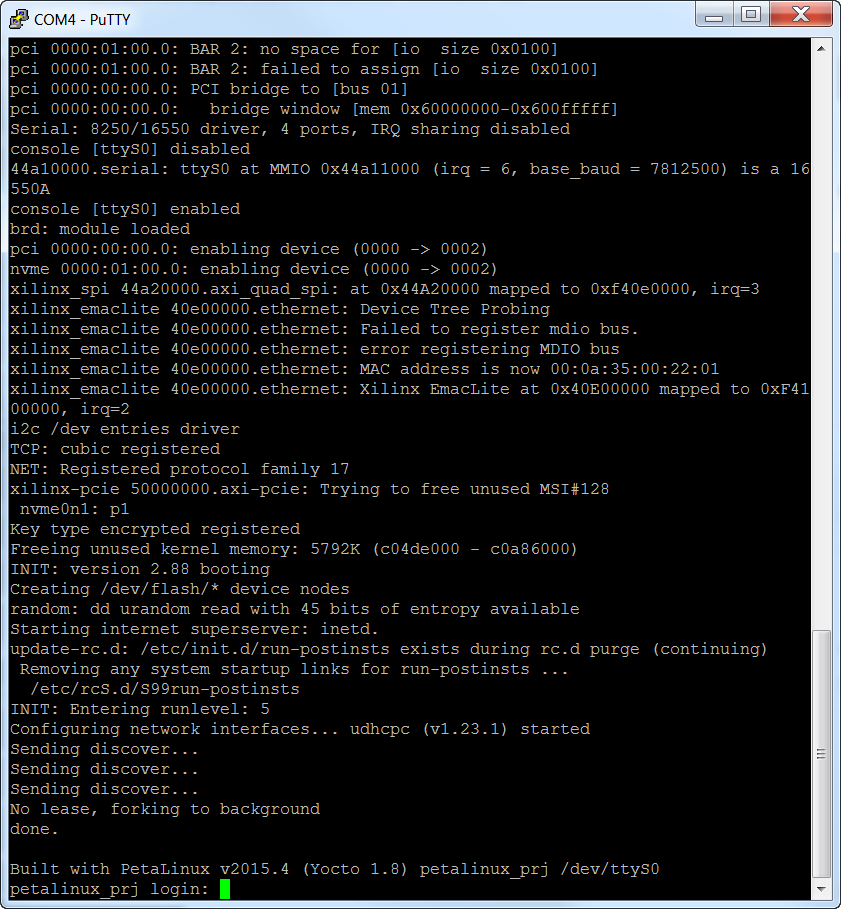
If you want to see the complete boot logs, here they are:
How to setup the NVMe SSD in PetaLinux
-
Log into PetaLinux using the username
root and the password root.
-
Check that the SSD has been enumerated using:
lspci. Without any arguments, you get the output as shown in the image below. By using the -vv argument, you get a more detailed output which tells you the link speed and how many lanes are being used, among other things. See the more detailed output here: lspci -vv for KC705 and lspci -vv for PicoZed.
-
Check that the SSD has been recognized as a block device using:
lsblk.
-
Create a partition on the SSD using:
fdisk /dev/nvme0n1.
-
Type
n to create a new partition
-
Then type
p, then 1 to create a new primary partition
-
Use the defaults for the sector numbers
-
Then type
w to write the data to the disk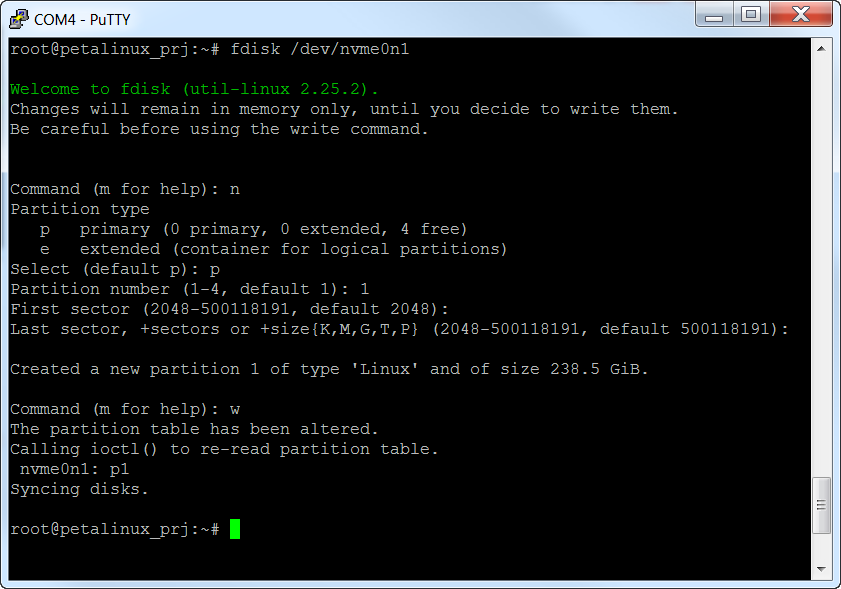
-
Run
lsblk again to get the name of the partition created. As you see in the image below, it is nvme0n1p1.
-
Create a file system on the new partition using:
mkfs -t ext2 /dev/nvme0n1p1. This will take a few minutes.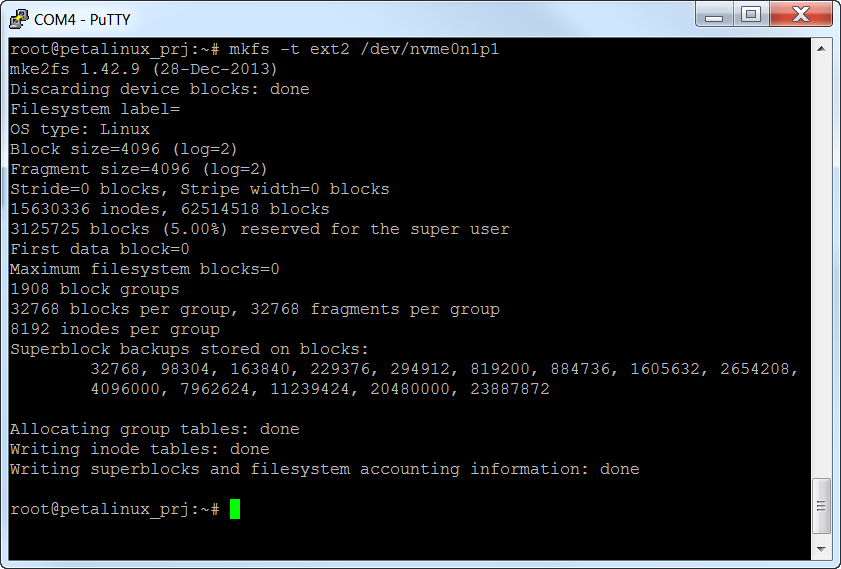
-
Make a directory to mount the file system to using:
mkdir /media/nvme.
-
Mount the SSD to that directory:
mount /dev/nvme0n1p1 /media/nvme.
-
Change to the
/media/nvme directory.
-
Create a file called
test.txt using vi test.txt.
-
In VI, press the capital letter
I (as in India) to start adding text to the file.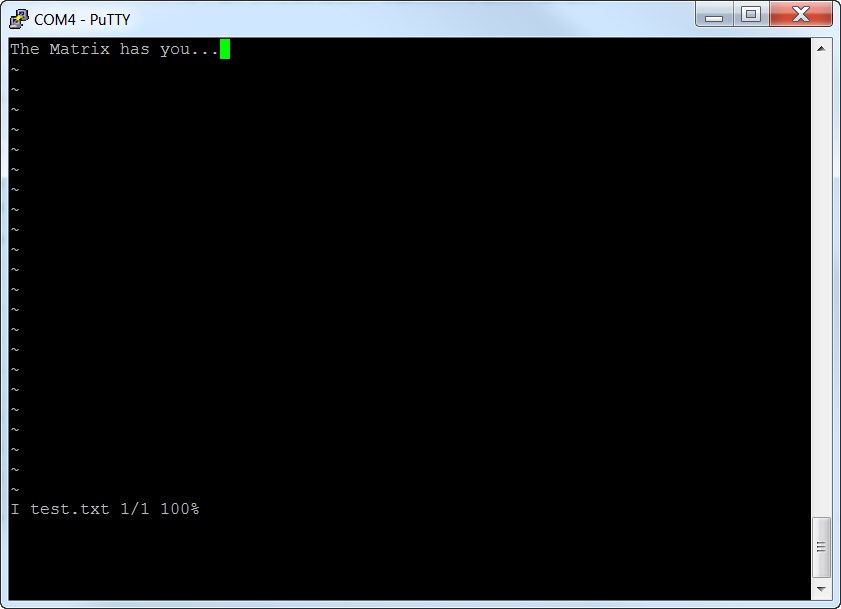
-
Now type
The Matrix has you... into the file, press Esc and then type “:x” (colon, then the letter x) to save the file and quit.
-
Now use
ls to see that the file is there.
Reboot
Let’s shut it all down and re-boot so that we can check that our file is still there after powering down.
-
Use
poweroff to shutdown Linux.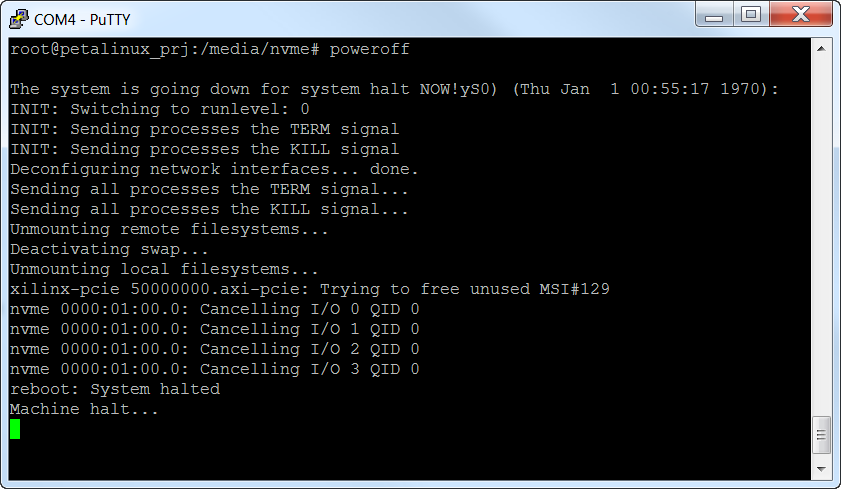
-
Power down the hardware.
-
Run through the steps to Boot PetaLinux over JTAG, until you have logged in again as root.
-
Create a directory to mount the SSD to again:
mkdir /media/nvme.
-
Mount the SSD to that directory:
mount /dev/nvme0n1p1 /media/nvme.
-
Change to the
/media/nvme directory.
-
Check that the file is still there using:
ls.
-
Display the file using:
cat test.txt.
What now?
Here are some interesting things you can explore which will be topics for future tutorials:
-
Using hdparm to measure the read/write speeds of the SSD
-
Creating a PetaLinux root file system on the SSD
-
Booting PetaLinux from the SSD
Source code Git repository
The sources for re-generating this project automatically can be found on Github here: FPGA Drive PCIe Root Complex design
Other useful resources
Here are some other useful resources for creating PCI Express designs:
If you have any questions about this tutorial, or if you run into problems, please leave me a comment below.

